Yesterday, I got an email from Asteroid and Alfalfa's new mom. They have adjusted well at their new home and are well on their way to being spoiled rotten!
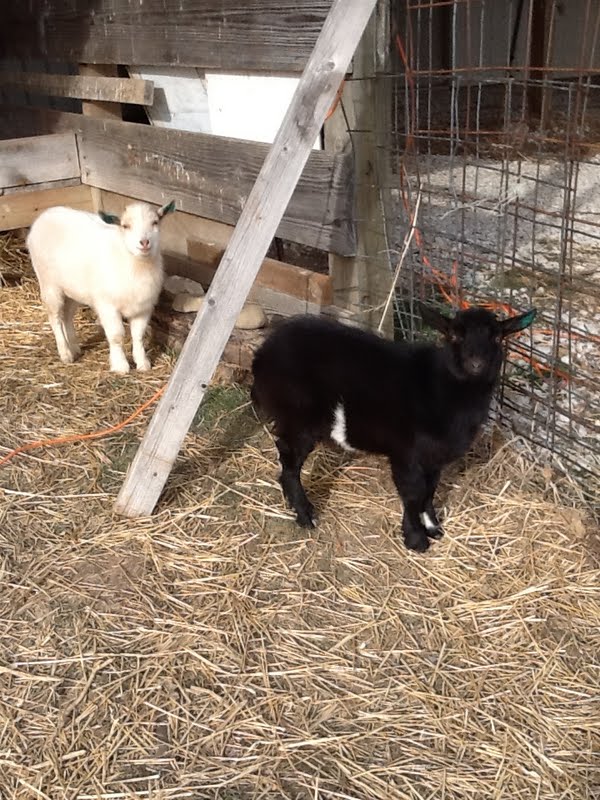
 In other news, Airess Elan' is showing signs of estrus, so she will be bred to Jasper Pine TN Top It Off today! WOOHOO!! I can't wait to see Airess babies and her FF udder!
0 Comments
Tattooing a goat is not hard to do, but I still get nervous every time I do it. I guess I'm a big softee, but the truth is that this procedure is relatively painless (think ear piercing) for the goat and they forget REALLY fast. Most of the time they do not even cry at all. Sometimes, you will get a whiner though. At Twin Willows, as at most farms, we tattoo the ears. The herdname designator (ours is TWF) goes in the right ear, and the year letter (preferred letter for 2012 is B, 2013 will be C, etc.) and unique number go in the left ear. Most breeders use birth order to choose the unique number. For example, if the goat you are tattooing was the first kid born in 2012, their unique code would be B1, and if they were the fifth kid born that year, the code would be B5, and so on. This letter/number combination goes in the left ear, and is unique to every goat in your herd. First, secure your goat in a stanchion and give him some grain. You will also need: Tattoo pliers (we use two) Green paste tattoo ink Letters and numbers to fit your pliers A toothbrush designated specifically for this job Rubbing alcohol Cotton balls LOTS of Paper Towels Surgical Gloves Antimicrobial Foaming Hand Wash Bloodstop powder (Just in case. Trust me.) A piece of paper or thin card board (MUY IMPORTANTE'!) A small container for cleaning used letters/numbers Procedure: The first thing you need to do is arrange the letters and/or numbers in the pliers, and screw down the set screw. It's also a good idea to set out the numbers and/or letters you will need for the next ear. Once you get the numbers and letters in place CHECK YOUR ORIENTATION ON A PIECE OF PAPER!! This is very important. Even if you KNOW that you put them in right, CHECK ANYWAYS! The worst thing would be learning that you put a number in upside down AFTER you tattoo the ear. Next, put your gloves on and dispense some of the green ink paste onto your toothbrush. Coat the needles with the ink on the toothbrush. Next, apply a liberal amount of antimicrobial foam to a cotton ball and clean the inside of the goats ears. Use a clean cotton ball for each ear. Next, position your pliers to the inside of the right ear to apply the herd designator. Be careful to position the letters/numbers to a smooth part of the ear to attempt staying away from any veins. I'm sorry I do not have a picture of positioning and applying the tattoo, as I did not have enough hands. Here is the result of applying the first tattoo. Next, take your toothbrush and scrub the ink into the wounds. Change out your letters/numbers for the next ear (or grab your other set of pliers.) Repeat the same process using the new code for the left ear. Remember, date code and unique number go in the left ear. Your goat will probably be more jumpy when you start the next ear, so have someone help hold his head if he is too much to handle by yourself. After both ears are tattooed give him some love, and tell him he was a good boy. I like to let them finish eating so I can watch them for a few minutes to make sure there is no bleeding. When you are finished tattooing, your pliers, letters, toothbrush and everything else that has ink on it (it always gets EVERYWHERE!) can be cleaned up with the rubbing alcohol and paper towels. I like to soak the letters in a small container of rubbing alcohol. I recommend NOT taking your gloves off until you are done cleaning. A word of caution: If you do happen to nick a vein when you are tattooing (as I did this morning on Asteroid's brother, Alfalfa) stay calm and don't panic. Apply pressure to the bleed and liberally apply blood stop powder ASAP, and the bleeding will stop. This was the first time I've ever nicked a vein when tattooing. I was prepared, and the blood stop powder was only about 5 feet away. It bled ALOT, but I managed to get it stopped quickly and he is no worse for the wear. I hope you enjoyed this week's tutorial on How to Tattoo a Goat. What would you like to learn next week? Leave me a comment with your suggestions!
Thank you visitors! We are averaging 122 unique visitors a day, and although I don't personally hear from most of you, I just wanted to take the time to say thank you for visiting! It's great to have so many people interested in our sweet goats. I look forward to hearing from you soon!
PS- Don't forget to like us on Facebook!! If you have never trimmed a goat's hooves, it may seem scary, but really it is a very simple and necessary procedure. Keeping your goat's hooves neat and trimmed help keep the feet free from disorder and disease, and help keep your goat happy and comfortable. At Twin Willows Farm, we trim our goat's hooves every 4-6 weeks. We find that some goats need their hooves trimmed more often, depending on the individual goat. The key is to check their hooves often, and make adjustments as necessary. The hoof walls, which is the area around the outside of the hoof, grow faster than the goat can wear them down, and so they must be trimmed. Put your goat in the stanchion and feed them some grain or treats to keep them calm and occupied. Here is a picture of Precious' hoof, which was last trimmed about one month ago. The first task is to clean the dirt and debris from the hoof with a hoof pick. Next, using hoof rot shears (which is a horrible name for them, but that is actually what they are called) trim the hoof walls so that they are flush to the pads of the toes. You may also need to trim the tips of the toes if they are "elfy." Remember that less is more here, and take your time to make sure you do not take too much too quickly. With really tough hooves, you might need to "chip away" at the walls in small bites to get through them. We find that the older the goat is, the tougher their hooves will be. Once the walls are flush with the soft part of the toes, take a look at the soft heel at the back of the hoof. This may also need trimmed in order to make the hoof level again. This part is always a little scary to me, but think of it as a cuticle or callus. As long as the flesh is still white when you trim, you are safe. If you start seeing pink flesh when you trim, STOP! Pink means you are getting close to blood. If you do draw blood, do not panic, and use some blood stop powder on the wound. The final task in hoof trimming is to check the dewclaws. These may also need trimming, and are similar to trimming the heel. White is ok, and pink means STOP! During show season, we like to use a Dremel on the hooves and dewclaws to make them smooth and pretty. This is not necessary, but you may also use a fine rasp to put the final touches on the hoof, and fine tune the levelness of the hoof. We hope that you enjoyed this tutorial. Stay tuned for next week's installment "How to Tattoo a Goat!"
Here at Twin Willows Farm, if we only have one or two does in milk, we choose to hand-milk instead of using the milk machine. We feel that the cleanup time required to use the milker is not justified by the time savings during milking. We currently only have one doe in milk, and her name is Precious. First, let's start off by listing the items required to hand-milk: A goat in milk (obviously) A stanchion w/ feeder A milk stool Some grain (we feed Purina Noble Goat) Paper towels 10% Bleach water solution in a spray bottle 1 clean & sanitized milk bucket Small cap or jar 1 gallon plastic bag (the twist tie kind, not the zipper kind) Fight-Bac Teat Disinfectant Spray How to milk: First, lead the doe to the stanchion. Ours usually come out of the stall willingly and go to the stanchion on their own, and when we have more than one doe milking they will come to the gate to be milked, in the same order, everyday. Feed your doe grain in the stanchion so that she is occupied during milking. This creates a pleasant experience for the doe and is enough to make her want to come to the parlor to be milked the next time. Cleanliness before,during, and after milking is paramount, especially if you intend to consume the milk, which we do. We line the milk bucket with the plastic bag. This makes everything easier to clean up while providing a sanitary vessel for storage and transport of the milk. Next, we spray the teats with the 10% bleach water solution and wipe clean with a clean paper towel, and use the bleach water solution to disinfect our hands, using a clean paper towel to dry them. We also have teat wipes to clean the teats before milking, but I, personally, like the bleach water better. I find that teat wipes create a stickiness on the teats and hands, and makes it difficult to milk. We find that the bleach water does not have any adverse effect on teats, but it DOES badly dry out the milker's hands. Next, strip each teat once into the small cap or jar to check for any signs of mastitis. Any blood, pus, lumps or irregularities is checked in this first milk. If all is clear you may proceed with milking. If not, you need to treat the doe for mastitis immediately. I prefer to milk from behind the doe, but you can easily milk from the side as well. If the doe is used to being milked and is content with letting you milk her while she eats, I find that milking both teats from behind is the easiest and fastest way to get it done. Place the bucket in front of and centered between the doe's back legs, underneath but slightly forward of the teats. Now you are ready to milk. The method of milking a doe depends mostly on the teat size (I can address this issue of smaller teats in a later posting.) Luckily, Precious has large teats, and I have small hands, so milking her is extremely easy. The trick to milking is to trap the milk at the base of the teat with your fingers and roll it out of the teat with your other fingers. I like to use my thumb and index finger in a circle to trap the milk, and then gently close each of my other fingers in turn to gently extract the milk out of the orifice. Note--The following pictures are a little awkward because I had to turn my hand toward the camera for demonstration. When milking, the backs of your hands should be parallel with the doe's inner thighs. When the teat is empty, I release my thumb and forefinger to let more milk into the teat, trap it again with my thumb and forefinger, and repeat the extraction by closing my other fingers down the length of the teat. Sometimes, I milk both teats simultaneously, while other times I alternate one teat and then the other. Whichever way you decide, it is important to milk both sides evenly to keep the two halves of the udder producing equal amounts of milk. The key to milking is to be gentle, yet firm and always be calm. Milking should be a relaxing experience for the goat as well as for the milker. Never pull or otherwise displace the natural position of the udder or teats. You should be able to gauge whether or not your doe is relaxed. If she tenses (and this is easy to gauge if you are paying attention) she may kick over or step in the bucket, so you need to be quick in the calmest way, and remove the bucket from under her before she moves. This tension or restlessness in the doe usually means that her grain is gone and she wants more. When this happens I remove the bucket and set it in a safe place, refill the grain, and start again. If she does kick over the bucket before you remove it, do not worry. It happens!! Clean it up and start over again. I've spilled lots of milk, and had lots of hooves in the milk bucket! Continue milking until there is no more milk to trap at the base of the teat. When her udder is empty, remove the bucket and set it aside. At this point, I get up from my stool, remove the bag from the bucket and tie a knot in the bag. The sooner the milk is out of the open air, the better. Next, I spray each teat with a hefty dose of Fight-Bac teat disinfectant to each teat. This helps to keep the teats clean and free of disease. Release your doe from the stanchion, and start your cleanup. If you are milking more than one goat, the next one in line is probably waiting at the gate. Make sure that everything is clean and disinfected thoroughly for the next milking.
Stay tuned for next week's installment, "How to Trim Goat Hooves." For the past couple of weeks, I have been brainstorming about how to make our website more useful to our visitors. I had come up with several ideas, but none of them were "just right." This morning as I was milking, I was thinking about all of the phrases I have typed into Google over the past two years to learn more about our goaties. If you are a goat owner, you probably already know that when you seek the answer to a question, you will more than likely receive a different answer from each source. We do not claim to know everything about goats, but we can at least share our experiences of what works, and doesn't work, for us. For this reason, I have decided to start a series of informational blogs that will be published on a weekly basis here on our front page. For this week's installment, I have chosen "How to Hand-milk a Goat." I will be working on putting a blog together with pictures and explanations on how we hand-milk a goat here at Twin Willows Farm. If you have a topic you would like to see on our page, feel free to use the contact page to suggest it.
We hope your New Year is off to a great start, and we thank you for your continued visits and patronage. Stay tuned! |
Click below to view
Twin Willows Herd 24/7 Livestream Welcome to
|